Difference between revisions of "NGS Order Entry"
(→Need Sequence Detection Only) |
(→Sample Submission Form) |
||
| Line 295: | Line 295: | ||
[[File:nsg38.png]] | [[File:nsg38.png]] | ||
| + | |||
| + | |||
| + | |||
| + | ==== '''Error Messaging - Sample Submission Form''' ==== | ||
| + | Error messaging for the Library Construction Only form and Sequencing Detection Only form appear in line and in red on the form itself. | ||
| + | |||
| + | An initial Microsoft pop up appears like below | ||
| + | |||
| + | [[File:nsg39.png]] | ||
| + | |||
| + | You must clear pop up by Clicking “OK” button and then view fields which are in error. | ||
| + | |||
| + | ===== ''' List of Error Messages''' ===== | ||
| + | Please see full list in Section 6.3 of the Appendix. | ||
| + | |||
| + | |||
| + | ===== '''Library Construction Only - Error Messaging''' ===== | ||
| + | Example Screen Shot | ||
| + | [[File:nsg40.png]] | ||
| + | |||
| + | |||
| + | ===== '''Sequence Detection Only - Error Messaging''' ===== | ||
| + | Example Screen Shot | ||
| + | [[File:nsg41.png]] | ||
| + | |||
| + | |||
| + | |||
| + | |||
| + | ==== '''Validation and Saving Sample Submission File''' ==== | ||
| + | Once the form is validated and there are no errors, you will receive this message: | ||
| + | [[File:nsg42.png]] | ||
| + | '''VERY IMPORTANT''' | ||
| + | |||
| + | you must then save the file to your local machine using File > Save or Save As function in MS Excel. | ||
== '''I placed my batch, now what? Reviewing Batch Status and Retrieving Results''' == | == '''I placed my batch, now what? Reviewing Batch Status and Retrieving Results''' == | ||
== '''Appendix''' == | == '''Appendix''' == | ||
Revision as of 17:14, 7 July 2016
Contents
- 1 Overview
- 2 GIGPAD Account Creation
- 3 New Study Registration
- 4 Batch Creation
- 4.1 Batch Details
- 4.2 Sample Submission Form
- 4.2.1 Access Sample Submission Form
- 4.2.2 Sample Submission Form - Research Home Page
- 4.2.3 Need Library Construction Only
- 4.2.4 Need Library Construction and Sequence Detection
- 4.2.5 Need Sequence Detection Only
- 4.2.6 Error Messaging - Sample Submission Form
- 4.2.7 Validation and Saving Sample Submission File
- 5 I placed my batch, now what? Reviewing Batch Status and Retrieving Results
- 6 Appendix
Overview
This document provides the information necessary to access PCPGM’s GIGPAD to submit and track information for Next Generation Sequencing (NGS) experiments.
- A PI and/or Researcher first need to have an account in GIGPAD.
- Upon account verification, a study should be created in order to request services and submit samples. Studies can be used for different purposes:
- Grouping of samples for processing or analysis associated with a general IRB number with a unifying theme.
- Single PI with several investigators associated with the work. Studies allow setting up the PI/investigator(s) relationships and facilitate managing the data captured under the study. If new investigators join later on they can be added to the study and access the data gathered easily.
- Grouping of control vs. case samples. Investigators can create studies to help them group and organize their samples and data
In the case of NGS studies most likely will be used for a and b.
- Once a study is created a batch is required to submit samples and services associated with these samples
- Once a batch is submitted and the lab receives the samples the experiment starts. Experiments can last days and the researcher can track some of the progress through their batch information in GIGPAD
- Once an experiment is completed and data and results are associated the researcher/PI can download information from the batch through GIGPAD
The following sections describe in detail all the steps required to successfully submit NGS experiments and review/download the results generated.
GIGPAD Account Creation
In order to create an Account in GIGPAD go to https://portal.hpcgg.org and click on “click here to request a login”.
 There are two types of external accounts in GIGPAD:
- Principal Investigator
- Researcher
Depending on your role select one or the other

Principal Investigator Information
Enter all the required information denoted by an *. If you need one or more physical invoices for billing purposes fill out the physical invoice information.
Once completed click on submit access request.
The request will be reviewed at the PCPGM. Once the request is approved you will receive an email with a temporary password that you will use along with the requested username to login into GIGPAD.
NOTE for Partners Researchers: Your username and password will be the same as your Partners username and password.

Researcher Information
Enter the information about yourself and your Principal Investigator’s. You can add as many investigators as you need to. You can also add physical invoice information for billing purposes.
Once done click on submit access request.
Your request will be reviewed at the PCPGM. Once your request is approved you will receive an email with a temporary password that you will use along with your requested username to login into GIGPAD.
NOTE for Partners Researchers: Your username and password will be the same as your Partners username and password.

New Study Registration
- Click on the 'Studies' tab

- Click on the 'New Study' tab

The facility could be a list if you are registered with multiple facilities. Choose DNA Sequencing.
The principal investigator should default to you (if logged in as a PI) or to your PI (if you are a researcher)
Note for Researchers: If you have relationships with more than one PI choose from the list.
- Click on Next Step(Study Definition)

- Enter the study information

- Enter the name that you would like to give your study
- Enter a description of your study
- Select your study coordinator from the drop down box(this could be yourself or a researcher in your study)
- Select researchers from the right box and click 'add' to associate those researchers to your study. Select names in the left box and click ‘remove’ to disassociate researchers
- Select 'yes' if your study requires IRB approval. Select 'no' if your study does not require IRB approval. If yes, fill in the following three fields. If no, then the following three fields remain grayed out and are not required.
- Note: if your study requires IRB approval it will need to be reviewed and approved by a Director at the PCPGM before you can submit samples.
- Once you have finished filling out all the required information click 'Next Step'
- If you intend to submit Sequencing batches for the ABI 3730, select the tests you may require for these batches. You need to select at least 1 service even if you are not going to use the ABI3730. This selection will not affect your NGS orders.

- If you need to track any specific annotations for samples in your study enter these in the following screen(optional)

- This drop down is used for adding annotations to a study. For an explanation of how to add annotations see Appendix 1.1
- Select a default value for an annotation
- Click 'remove' to delete any annotation from your default annotations list.
- Once you are satisfied with your setup click 'Next Step' to proceed.
Note: Click 'Save and Finish later' to save your study setup and continue later at any step
- Enter Billing Information for your Study
 Billing for a study can be allocated across one or more funding sources. Billing for batches submitted under this study will default to the study’s setup. Funding Sources can be:
- PeopleSoft Numbers, if you have a Partners funded Grant
- Invoice and PO# if you belong to an external institution or for-profit organization
The total allocation for funding sources should be 100.
- There will be an Invoice to line for every Physical Invoice label provided when the account was created.
- Funding type for Invoices should be AMC if your study is funded by an Academic Medical Center or For Profit if your funds are Industry based or For Profit.
- People Sort Funding Sources can be selected(our of or entered)
- Enter or Select PeopleSoft Number

- Select an existing PeopleSoft Number or enter a new one by clicking Add Number
- A popup will appear, enter the number and click ok
- Enter the allocation for the funding sources and click Next Step (Review and Create Study)
- Enter Allocations

Once you have entered in all the funding source numbers you wish to use for your study click ‘Next Step’ (Review and Create Study)
 Review your Study setup. If everything is in order click ‘Create Study’
Click on the Studies tab, your new study should be listed in the list of studies. From this page you can access all the batches submitted under a particular study, view and edit study details such as researches associated and funding sources.
When your study has been created, you can order NGS services for your samples by submitting a batch.
Batch Creation
- Click on Batches - New Batch
- You must either select a Study by either
- Selecting New Order under the Actions tab or
- Entering a Study Code in the text box and clicking New Order button

Click on the New Order link on the study for which you’ll submit a batch
- Select Platform

Batch Details

- Primary Contact: Defaults from study and can be changed for the batch
- Batch Name: Optional name to identify your batch
- Sample Type: Select RNA, Genomic DNA, shRNA Genomic, PCR Treatment, Library, or Other
- Note: Do not override Sample Type after Sample Submission File Import.
- If other is selected enter the type in this field
- Number of Samples: Will be pre populated once the sample input file is uploaded
- Note: Do not override Number of Samples after Sample Submission File Import.
- Download Template: (see Sample Submission Form section)
Sample Submission Form
This section describes the functionality for completing the Sample Submission Sheet for Next Generation Sequencing orders. The following topics will be covered
- Sample Submission Sheet access
- Need Library Construction Only – Form
- Need Library Construction and Sequence Detection - Form
- Need Sequence Detection Only - Form
- Error Messaging
- Saving your form
Access Sample Submission Form
You will access the Sample Submission Form from the Download Template link in Step 1

- Clicking on “Download Template” link will present you with the following pop up.

- Click save and select location on your desktop to place the .xls file.
- Please note that MS Excel 2003 must be installed on your system
- If you are using a newer version of MS Excel, please save the Sample Submission File in the .xls format.
Mac and Linus Users
Please contact Alison Brown for assistance in completing and submitting the Sample Submission Forms.
Contact Information Name: Alison Brown Phone: (617) 768-8470 E-mail: ABROWN13@PARTNERS.ORG
Sample Submission Form - Research Home Page
- Open up MS Excel workbook that was saved
- At Security warning choose "Enable Macros" button
- Note: This warning may not appear depending on the computer's secruity settings.

Sample Submission Form - Home Page

Need Library Construction Only
To access Need Library Construction Only form – click on the following button on the Sample Submission Form Home Page

Need Library Construction Only Form

- Select Type of Sample, Type of Library, and Barcode/Index or No Barcode/Index values using the radio buttons. You may select only one value for each category
- Enter values in Sample Details table.
- Important: When entering sample name in the “Labeled As” column only use the following characters:
- a. alphanumeric characters b. Period ( . ) c. Dash ( - ) d. Underscore ( _ )
- Important: When entering sample name in the “Labeled As” column only use the following characters:
- Click
 button to add another line in the Sample Details section.
 - Validation Button - when finished entering values click on the Validate button
- Requested Fragment Size field: single or multiple values are accepted.

Example: Single = 400 Multiple Values = 200,300,400
Note: Requested Fragment Size is the size that the DNA is to be sheared at; also know as the “insert size”. If the whole genome sequencing is to be done then the insert size should be 400 bp and if the whole exome sequencing is being carried out then 200 bp should be chosen.
- See Error Messaging in section 4.2.6
Need Library Construction and Sequence Detection
To access Need Library Construction and Sequence Detection form – click on the following button on the Sample Submission Form Home Page

Need Library Construction and Sequence Detection Form

- Select Type of Sample, Type of Library, and Barcode/Index or No Barcode/Index values using the radio buttons. You may select only one value for each category
- Enter values in Sample Details table.
Important: When entering sample name in the "Labeled As" column only use the following characters: numbers, letters, dash, underscore, parentheses, period and space.
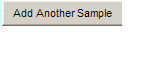
- Add Another Sample button allows you to add anotehr line in the Sample Details section.
- Continue Button - when finished entering values click on the Continue button.
- See Error Messaging in section 4.2.6
- Note: This form and functionality is the same as the Library Construction Only form with the exception of the "Continue" Button, which leads to the Sequence Detection form.
Values carried over to Sequence Detection Form
The following values that are entered onto the Library Construction Form will be carried over to the Sequence Detection Form and do not need to be reentered.
- Type of Library
- Type of Library [seen as Read Type in Sequence Detection form]
- Barcode, Index, or No Barcode/Index
- Sample Details
- “Labeled As” value
- Requested Fragmentation Size [becomes Size(bp) in Sequence Detection Form]
Need Sequence Detection Only
To access Need Sequence Detection Only form – click on the following button on the Sample Submission Form Home Page

Need Sequence Detection Only

General Use
- Select a single value using the radio buttons for the following categories
- Type of Library
- Read Type
- Cycles Required
- Type of Instrument
- Indexed, Barcoded, or No Indxing or Barcode Needed
- Complete values in Sample Details sections
Important: When entering sample name in the “Labeled As” column only use the following characters: numbers, letters, dash, underscore, parentheses, period and space.
- Select "Validate" Button when complete
Other Functions and Feature Exposure
- Size and Position values are only available when you select “Sequence Detection Only” from Sample Form Home page and selects Barcoded or Indexed.

- Additional Bias entries for 5’ Bias Sequence and 5’ Bias Notes/3’ Bias Sequence and 3’ Bias Notes becomes available by clicking the check box next to “Additional Bias”.
Note: You must fill in at least one of the four available text boxes.

- When Barcoded is chosen: Pooled is available in Sample Details.

- When Indexed is chosen: Pooled and Indexing Primer are available in the Sample Details

a. Indexed is chosen: De-Multiplexing option is automatically checked and the user must complete the values for the a.) Pooled Library Label b.) Individual Library Name c.) Barcode/Index Sequence.

- When Single Read in Read Type is selected, then 150 cycles is no longer an option.
- When Paired End Read is selected in Read Type, then 18 cycles is no longer an option.
- Type of Library “Other” – You may enter free form text

- Pooled column in Sample Details table includes drop down with Yes and No values only. You must select one of these values.
- When Pooled column selection is ”No” then Barcode/Index Sequence (Required if Pooled = “No”) column appears and Indexing Primer column appears in the Sample Details table.

a. Additionally, Text box appears above Sample Details table with instructions “Please provide details on how you would like to Pool the Libraries:”

- When you select Indexed or Barcoded and at least one Pooled value is “Yes” then the De-Multiplexing option appears below the Sample Details table.

- When you select De-Multiplexing, the following table appears below the Sample Details table.

Error Messaging - Sample Submission Form
Error messaging for the Library Construction Only form and Sequencing Detection Only form appear in line and in red on the form itself.
An initial Microsoft pop up appears like below

You must clear pop up by Clicking “OK” button and then view fields which are in error.
List of Error Messages
Please see full list in Section 6.3 of the Appendix.
Library Construction Only - Error Messaging
Example Screen Shot

Sequence Detection Only - Error Messaging
Example Screen Shot

Validation and Saving Sample Submission File
Once the form is validated and there are no errors, you will receive this message:
 VERY IMPORTANT
you must then save the file to your local machine using File > Save or Save As function in MS Excel.