Difference between revisions of "Study Registration Help"
Jump to navigation
Jump to search
(Created page with "== '''New Study Registration''' == * Navigate to '''Studies -> New Study''' * Click on ''Next Step(Study Definition)'' File:dna_seq_1.png * Enter the ''Study Name'' that...") |
m (separate steps) |
||
| Line 7: | Line 7: | ||
* Enter the ''Study Name'' that you would like to give your study. | * Enter the ''Study Name'' that you would like to give your study. | ||
| + | |||
| + | |||
| + | == '''Step 1 of 5: Study Definition'''== | ||
[[File:dna_seq_2.png]] | [[File:dna_seq_2.png]] | ||
| Line 14: | Line 17: | ||
* Once you have finished filling out all the required information, click ''Next Step(Select Services)''. | * Once you have finished filling out all the required information, click ''Next Step(Select Services)''. | ||
| + | |||
| + | |||
| + | == '''Step 2 of 5: Select Services''' == | ||
[[File:dna_seq_3.png]] | [[File:dna_seq_3.png]] | ||
| Line 28: | Line 34: | ||
''*Note: Click ‘Save and Finish later’ to save your study setup at the current step.'' | ''*Note: Click ‘Save and Finish later’ to save your study setup at the current step.'' | ||
| + | |||
| + | |||
| + | |||
| + | == '''Step 3 of 5: Default Billing Information''' == | ||
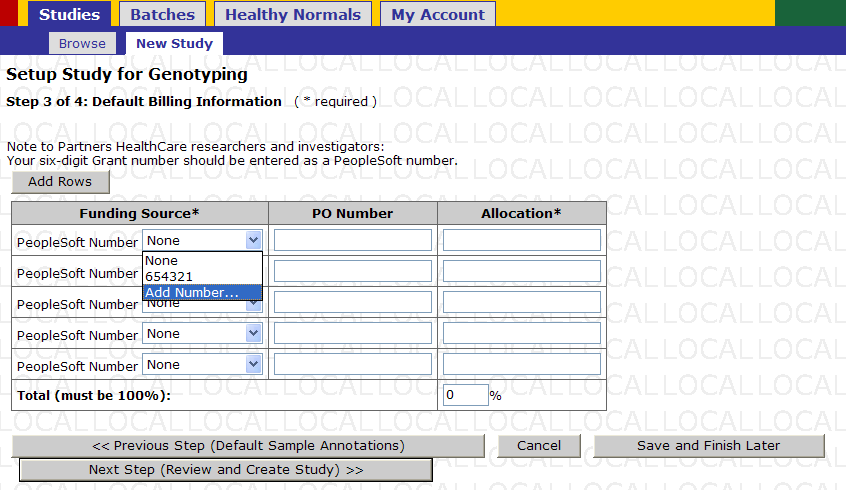
[[File:dna_seq_5.png]] | [[File:dna_seq_5.png]] | ||
| Line 41: | Line 51: | ||
* Once you have entered all the funding source numbers you wish to use for your study click ''Next Step (Review and Create Study)'' | * Once you have entered all the funding source numbers you wish to use for your study click ''Next Step (Review and Create Study)'' | ||
| + | |||
| + | |||
| + | |||
| + | == ''' Step 5 of 5: Review and Create Study''' == | ||
[[File:dna_seq_8.png]] | [[File:dna_seq_8.png]] | ||
Revision as of 17:08, 7 July 2016
Contents
New Study Registration
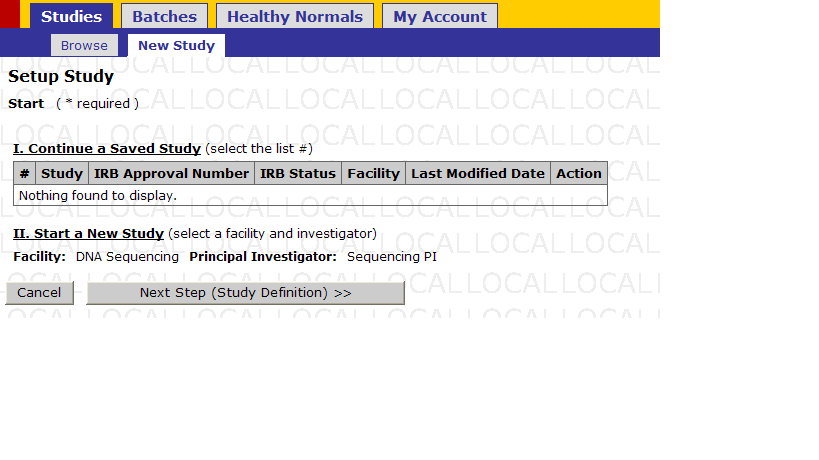
- Navigate to Studies -> New Study
- Click on Next Step(Study Definition)
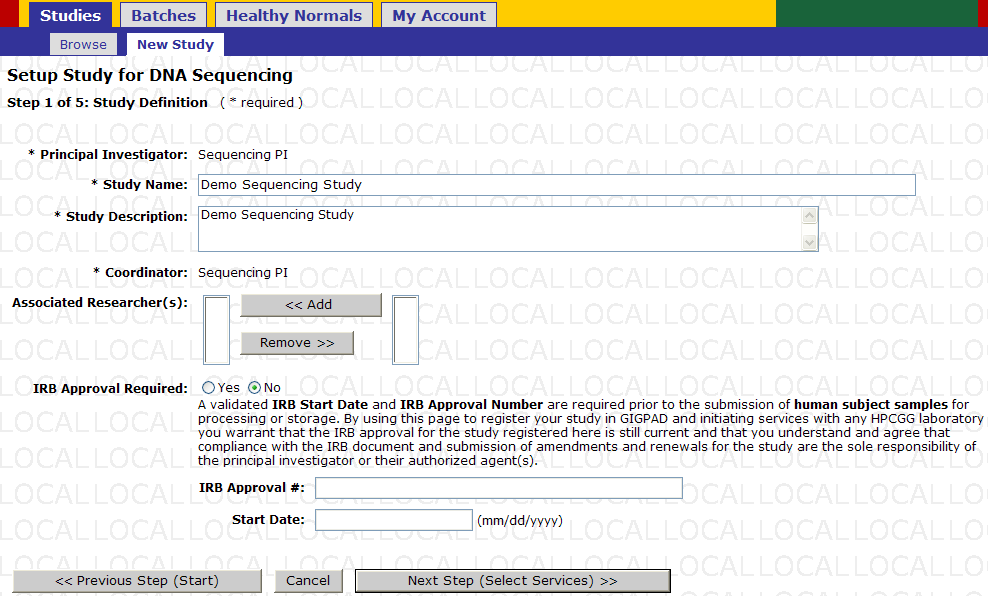
- Enter the Study Name that you would like to give your study.
Step 1 of 5: Study Definition
- Enter a Study Description of your study.
- Select Associated Researcher(s) from the right box (if any) and click 'add' to associate those researchers to your study. Select names in the left box and click 'remove' to disassociate researchers.
- Select 'yes' if your study requires IRB approval. If yes, fill in the following three fields. If no, then the following three fields remained grayed out and are not required.
- Once you have finished filling out all the required information, click Next Step(Select Services).
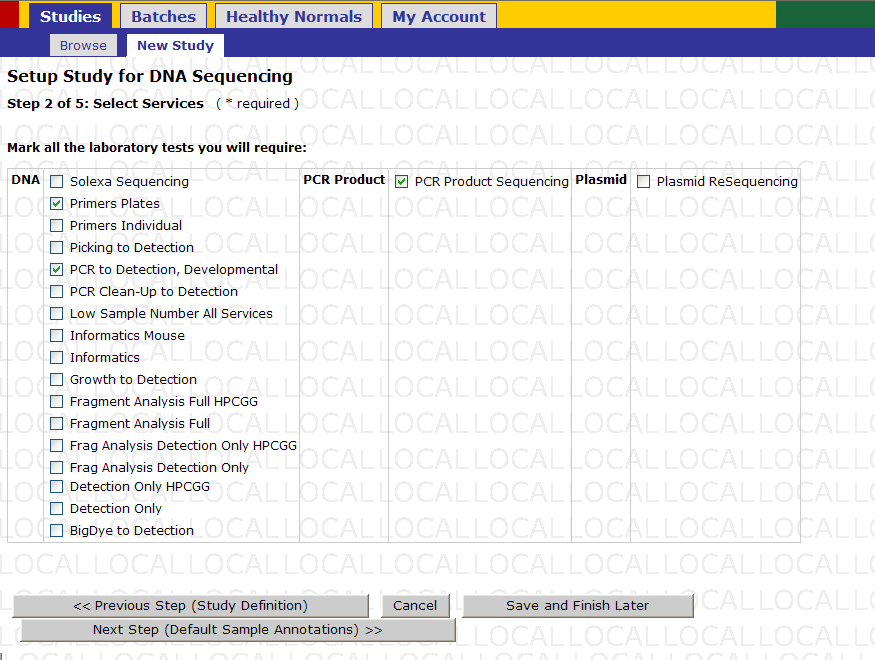
Step 2 of 5: Select Services
- Select the services you would like to request for your study.
- The services are listed against each sample type.
- Once you have finished selecting the required services, click Next Step(Default Sample Annotations).
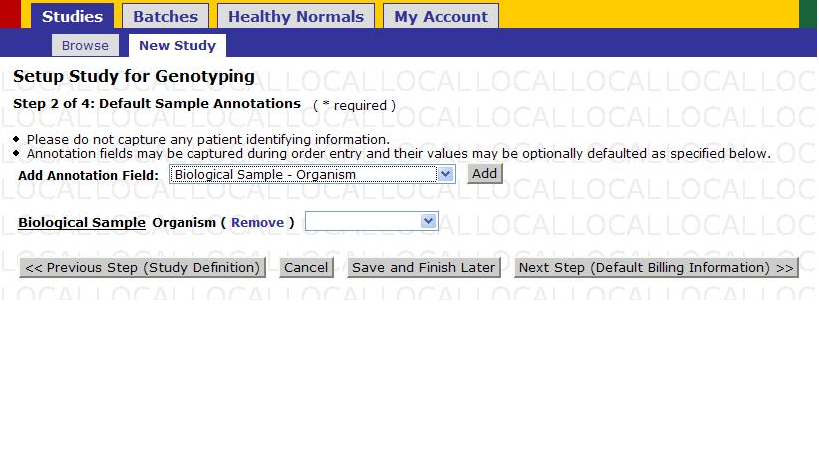
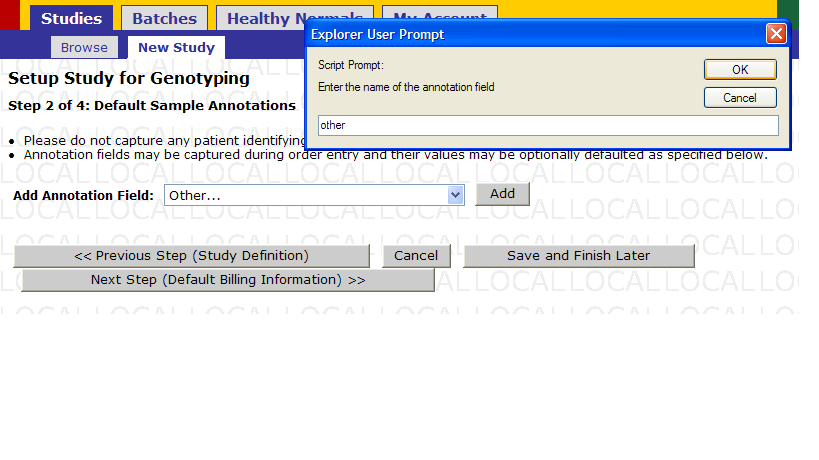
- The drop down is used for adding annotations to a study. For an explanation of how to add annotations see Appendix 1.1
- Select a default value for an annotation.
- Click ‘remove’ to delete any annotation from your default annotations list. Once you are satisfied with your setup click Next Step (Default Billing Information) to proceed
*Note: Click ‘Save and Finish later’ to save your study setup at the current step.
Step 3 of 5: Default Billing Information
- Select either an existing PeopleSoft number or select Add Number. If you select an existing number skip the next action and proceed to next step. If you wish, you can select multiple funding sources.
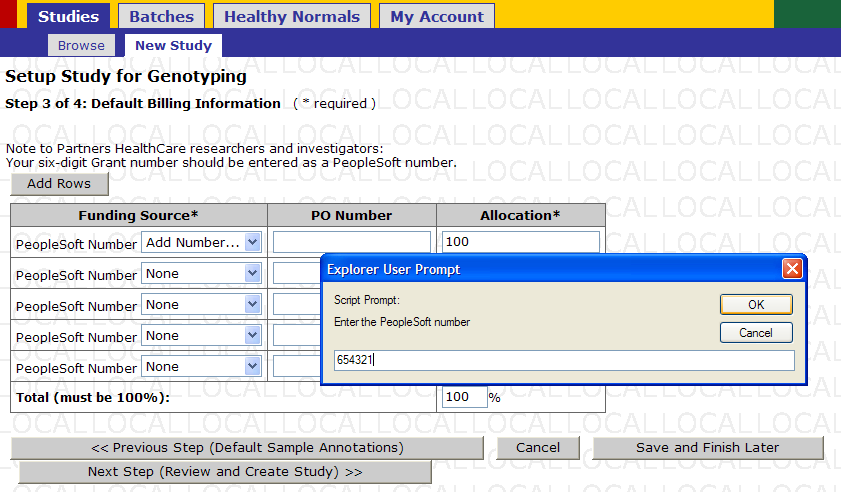
- Enter the PeopleSoft number you wish to have billed for work performed in your study.
- Click 'OK' once you have entered your number and checked to make sure it is correct.
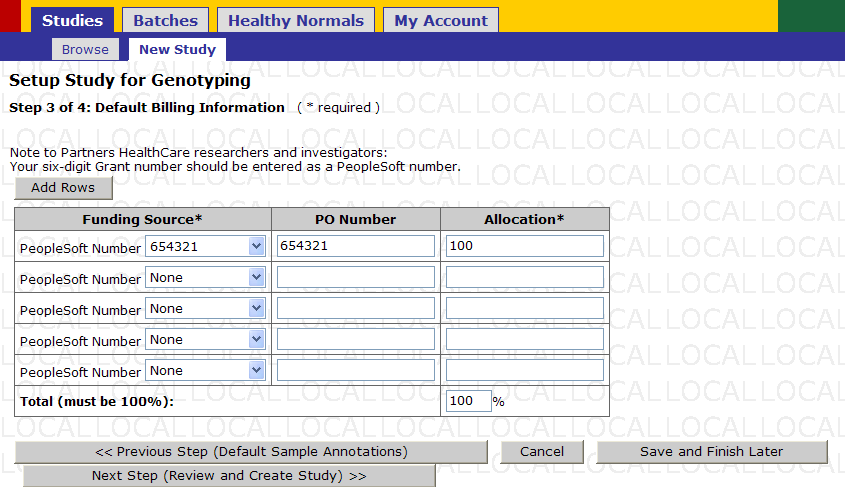
- Once you have entered all the funding source numbers you wish to use for your study click Next Step (Review and Create Study)
Step 5 of 5: Review and Create Study
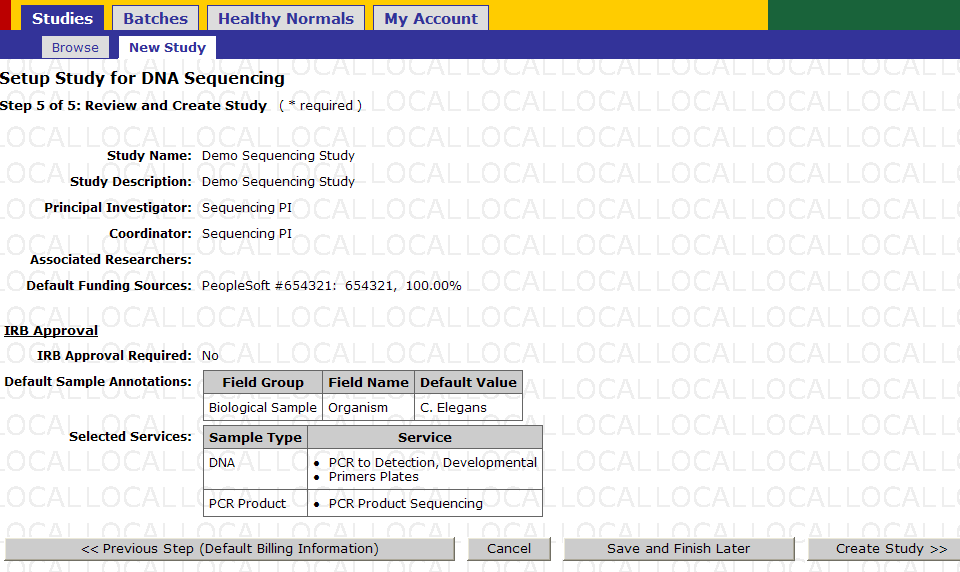
- Review your Study setup. If everything is in order click Create Study.
Appendix
- Select an annotation from this drop down or select other then click 'Add'
