Difference between revisions of "BSF Multiple Subjects"
m (added steps) |
(Added photo constraints and bolden titles) |
||
| Line 1: | Line 1: | ||
| − | == | + | == Overview == |
The following image depicts at a high-level the steps required for submitting a multi-subject order. | The following image depicts at a high-level the steps required for submitting a multi-subject order. | ||
| − | [[File:bsf_ms_1.png]] | + | [[File:bsf_ms_1.png|700px]] |
| − | + | == Step 1: Create New Order == | |
| − | == | ||
* Click on ''Batches''. | * Click on ''Batches''. | ||
| Line 11: | Line 10: | ||
* Click ''New Order'' underneath the ''Actions'' column for the appropriate Study. | * Click ''New Order'' underneath the ''Actions'' column for the appropriate Study. | ||
| − | [[File:bsf_ms2_.png]] | + | [[File:bsf_ms2_.png|700px]] |
* Choose the option for new order type. | * Choose the option for new order type. | ||
* Click ''Next Step(BSF Standard Order Type)'' | * Click ''Next Step(BSF Standard Order Type)'' | ||
| − | [[File:bsf_ms3_.png]] | + | [[File:bsf_ms3_.png|700px]] |
* Select option for ordering services and submitting samples for '''multiple subjects'''. | * Select option for ordering services and submitting samples for '''multiple subjects'''. | ||
| − | [[File:bsf_ms4_.png]] | + | [[File:bsf_ms4_.png|700px]] |
| − | |||
| − | == | + | == Step 2: Batch Definition == |
* Ability to 'Download Template' and once populated 'Upload' records to Gigpad. | * Ability to 'Download Template' and once populated 'Upload' records to Gigpad. | ||
| − | [[File:bsf_ms5_.png]] | + | [[File:bsf_ms5_.png|700px]] |
a) Template: You must download template and save it to your ''Desktop''. | a) Template: You must download template and save it to your ''Desktop''. | ||
| Line 42: | Line 40: | ||
• PaxGene | • PaxGene | ||
• Yellow | • Yellow | ||
| − | |||
''' Whole Blood Example''' | ''' Whole Blood Example''' | ||
| − | [[File:bsf_ms6_.png]] | + | [[File:bsf_ms6_.png|700px]] |
'''Note:''' In Excel, zero’s frequently get cut off. For example, if Subject Identifier is put in as “000012345,’ it will populate as ‘12345.’ | '''Note:''' In Excel, zero’s frequently get cut off. For example, if Subject Identifier is put in as “000012345,’ it will populate as ‘12345.’ | ||
| Line 52: | Line 49: | ||
'''Other Specimen type example''' | '''Other Specimen type example''' | ||
| − | [[File:bsf_ms7_.png]] | + | [[File:bsf_ms7_.png|700px]] |
| − | |||
b) Upload: | b) Upload: | ||
If file upload completes successfully, `Sample Input Files` box will be populated with file detail similar to below. | If file upload completes successfully, `Sample Input Files` box will be populated with file detail similar to below. | ||
| − | [[File:bsf_ms8_.png]] | + | [[File:bsf_ms8_.png|700px]] |
| − | + | == Step 3: Container Information Validation == | |
| − | == | ||
The following screen will be pre-populated with the information from the file. | The following screen will be pre-populated with the information from the file. | ||
| − | [[File:bsf_ms9_.png]] | + | [[File:bsf_ms9_.png|700px]] |
| − | + | == Step 4: Select Services == | |
| − | == | ||
Continue to the services selection screen | Continue to the services selection screen | ||
If the derivatives need to be shipped out, select a processing service + ship-out). For example DNA Extraction + Ship out | If the derivatives need to be shipped out, select a processing service + ship-out). For example DNA Extraction + Ship out | ||
| − | [[File:bsf_ms10_.png]] | + | [[File:bsf_ms10_.png|700px]] |
| − | == | + | == Step 5: Billing Information == |
Continue to the billing screen and review and confirm. | Continue to the billing screen and review and confirm. | ||
| + | == Step 6: Review Order == | ||
| − | + | [[File:bsf_ms11_.png|700px]] | |
| − | |||
| − | [[File:bsf_ms11_.png]] | ||
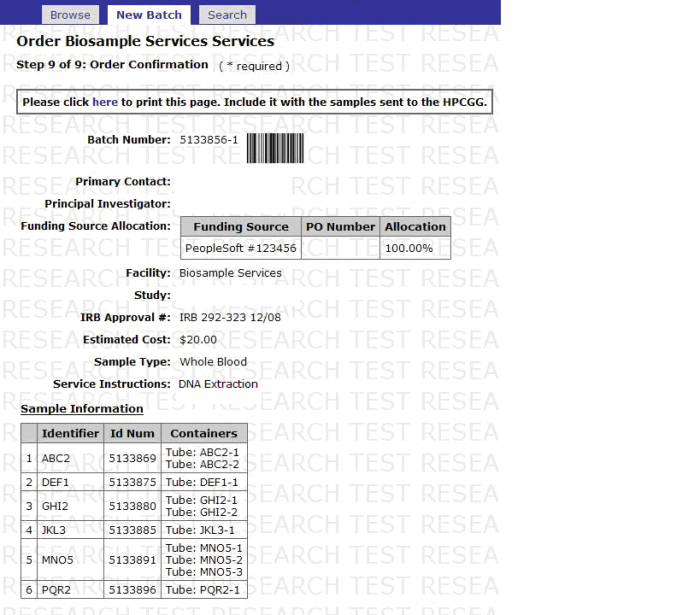
| − | == | + | == Step 7: Order Confirmation == |
| − | [[File:bsf_ms12_.png]] | + | [[File:bsf_ms12_.png|700px]] |
| − | [[File:bsf_ms13_.png]] | + | [[File:bsf_ms13_.png|700px]] |
Latest revision as of 21:01, 28 September 2016
Contents
Overview
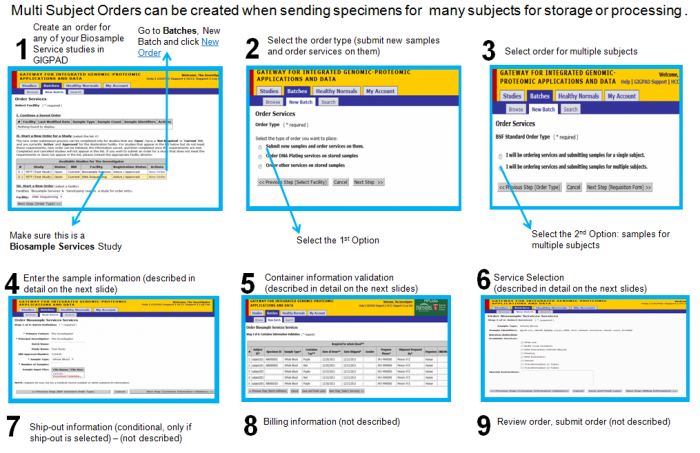
The following image depicts at a high-level the steps required for submitting a multi-subject order.
Step 1: Create New Order
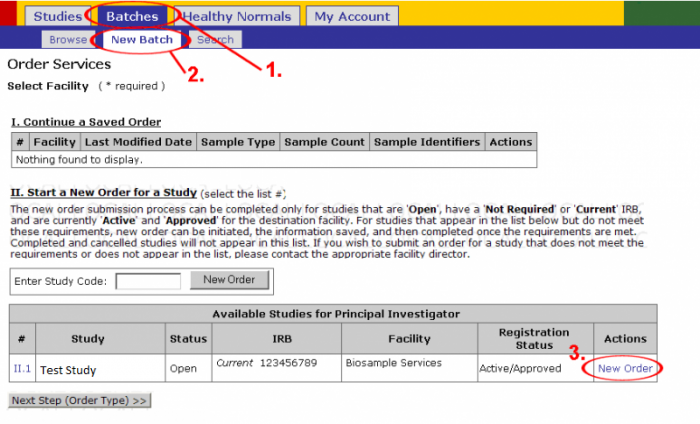
- Click on Batches.
- Click on New Batch.
- Click New Order underneath the Actions column for the appropriate Study.
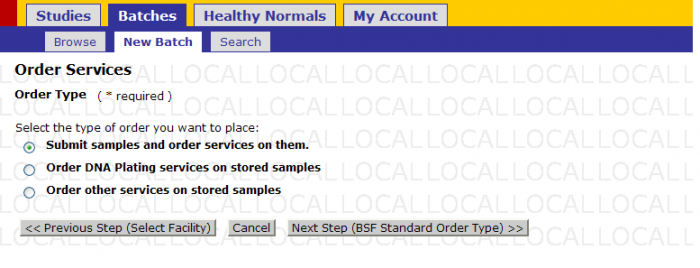
- Choose the option for new order type.
- Click Next Step(BSF Standard Order Type)
- Select option for ordering services and submitting samples for multiple subjects.
Step 2: Batch Definition
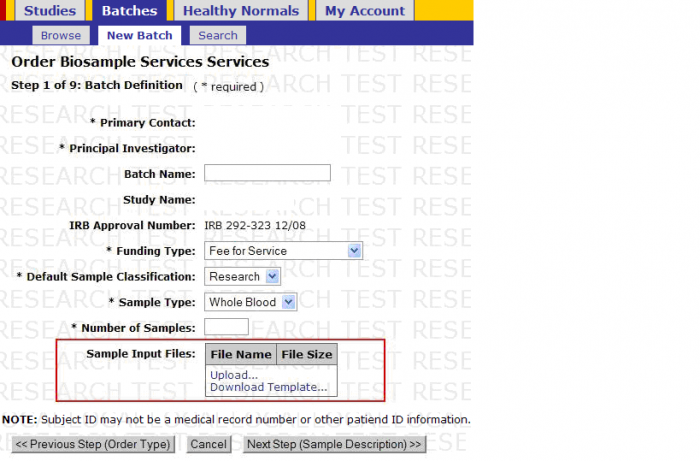
- Ability to 'Download Template' and once populated 'Upload' records to Gigpad.
a) Template: You must download template and save it to your Desktop.
Do not change the format of the template, or files will not upload. The format should be Excel 97-2003.
IMPORTANT: Every line represents a container. If more than 1 tube is sent per subject, every single tube must be entered in a different line. When sending whole blood for processing the draw date and container tops are required.
The following container tops are recognized by our systems: • Purple • Red • Pink • Lavender • PaxGene • Yellow
Whole Blood Example
Note: In Excel, zero’s frequently get cut off. For example, if Subject Identifier is put in as “000012345,’ it will populate as ‘12345.’
Other Specimen type example
b) Upload: If file upload completes successfully, `Sample Input Files` box will be populated with file detail similar to below.
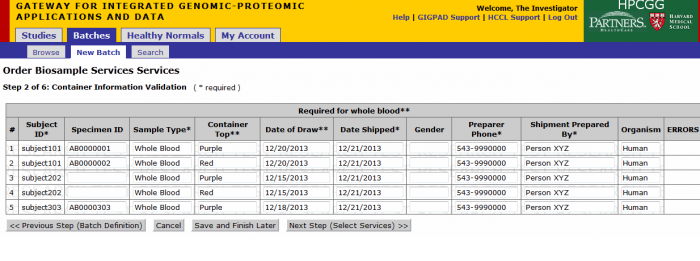
Step 3: Container Information Validation
The following screen will be pre-populated with the information from the file.
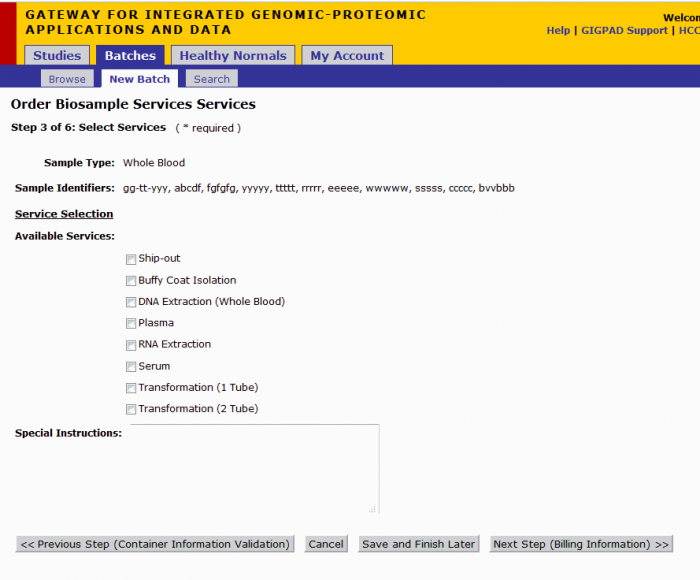
Step 4: Select Services
Continue to the services selection screen If the derivatives need to be shipped out, select a processing service + ship-out). For example DNA Extraction + Ship out
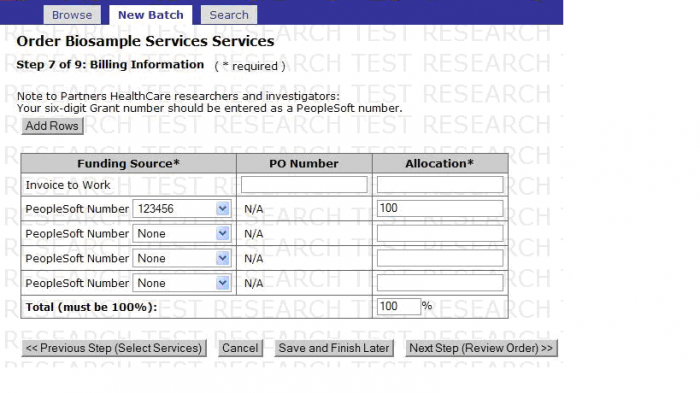
Step 5: Billing Information
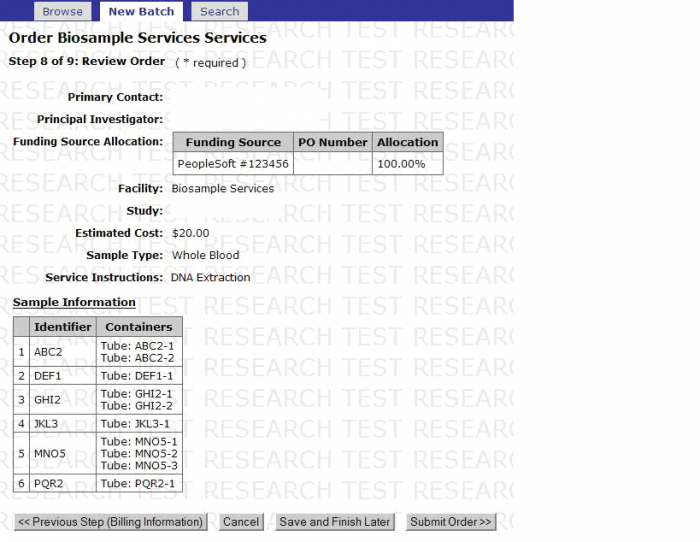
Continue to the billing screen and review and confirm.
